If the issue you are experiencing with your ATV or recreational vehicle is not resolved after checking and performing all the necessary recommendations, then you will have to bring it in for servicing with all the normal and customary service fees (labor, parts, and tax). Starting in January 2015, service techs will no longer take calls from customers
By your reaching this page, you hereby waive any and all liability against R/R Sports International, Inc. dba Blaze Powersports and Outdoors, its employees, agents, or otherwise for any injury or loss, physically, emotionally, psychological, or financial by following these trouble shooting techniques even if followed as suggested, illustrated, or depicted in words or video or pictures. And all information provided is "as-is" and provided without recourse whatsoever for any failure if the trouble shooting techniques fail to work or cause further injury to the vehicle. If you have any doubt as to your being able to perform these techniques-then seek the assistance of a trained service technician with small engines and/or recreational vehicles.
Liability Disclaimer. All information or services provided on the site are "as is," and that we make no claims about whether that information or service is fit for use for any purpose. Furthermore, we disclaim any liability or responsibility for any errors or omissions on the site. Moreover, we will not be held liable for any injury occurring to the user, bystander, or other third party nor for any damage to any personal property, structure, or unit for attempting these trouble shooting techniques even if the instructions were followed verbatim or by the videos where applicable. If in doubt, please seek the assistance of a trained service technician or bring your unit in for servicing. These videos are for demonstrational purposes only.
OKAY, now that you have purchased your new unit from us, there are things that do occur and will occur with your unit from even the next day after purchase or years later. I know it is somehow hard to believe but the human body is much more resilient than even the strongest mechanical device out there on the market. The human body will heal itself, a machine will not. Proper and routine maintenance is not a choice but an absolute if you want the unit to last.
These recreational units are similar to a lawnmower. Lawnmowers need to be serviced routinely, i.e. changing the oil, the blades, filters, etc. Recreational units are usually driven or operated in a much more harsher manner, therefore, constant attention is necessary. Think of a recreational vehicle as being a two-year old. If you are not up to the task, either do not have one, or learn to service it properly, or be willing to have it serviced by a professional.
Another note: You cannot expect us as a dealer offering these vehicles at super low prices to give free service. If you go to a dentist and he fills a cavity and tells you to cut down on sweets and you do not and get another cavity do you expect him to fill it for free? When your refrigerator or other appliance gives out, do you expect the appliance dealer to repair it free of charge when you refused to purchase an extended warranty? Come on, let's get real and stop living in fantasy. But we are here to assist you to the best of our ability through these videos and/or by in-shop service at reduced rates if you purchased a vehicle from us. Our rates are higher for vehicles purchased elsewhere as we have to spend time locating parts from other than our normal sources, spending time with schematics and technical specifications that we are unaccustomed, and so forth. Our mechanics and service techs now are working upon contract; therefore, they will not take calls concerning service or repair issues. You may call to have your vehicle serviced in-shop during normal operating hours.
BEFORE YOU CALL US TO SCHEDULE A SERVICE VISIT OR HAVE A FIT, REMEMBER MOST ISSUES ARE SIMPLE TO OVERCOME, ESPECIALLY IF YOU HAD REMEMBERED EVERYTHING YOU WERE INSTRUCTED. IF YOU ARE HAVING TROUBLE STARTING YOUR UNITS PLEASE TRY THE FOLLOWING and VIEW THE SELF HELP VIDEOS THAT WE HAVE PREPARED (PLEASE SCROLL DOWN THE LIST):
1. Check you handlebar kill switch--make sure it is in the "run" position.
2. On the remote kill switch--make sure that you have the key on and you depress the "unlock" black button below the purple button.
3. Make sure the battery is fully charged.
4. If you get absolutely no sound when trying, check your inline surge fuse in the little white plastic container near the positive (red) wire of the battery.
5. If you get sound but it doesn't want to start, and the kill switches are disengaged, then check to make sure you are getting fuel to the carb from the tank. Check you fuel petcock below the tank to insure that it is on. If in doubt, pull the fuel line going to the carb off and check for gas coming and immediately replace it on the carb.
6. If the vehicle starts but won't stay running, check to make sure your choke (gold lever) on the carb is down. You are probably flooding it causing it to run rough and stall.
REMEMBER, WE ARE NOT BABY SITTERS, EACH CUSTOMER HAS HIS OR HER OWN RESPONSIBILITY TO MAINTAIN THEIR VEHICLES BUT WE WILL ASSIST WHERE POSSIBLE.
____________________________________________________________________________________________________
REGARDING FUEL TREATMENT VERSUS ETHANOL-FREE GAS:
Yes, you can use fuel treatment with ethanol-free gas. Be mindful, that a lot of older stations offering ethanol-free gas have older underground storage tanks and some leak water into them. I have had to perform head jobs on some units after water was in gas causing an explosion in the head bending valves, etc. You can easily check for water by pouring some into a clear glass container and watch for separation. Separation will happen within 30 minutes if the container is left undisturbed.
Another consideration with fuel stabilizer, it is still no guarantee that your carburetor will not foul up. There are no guarantees in life. Even if using ethanol-free gas with fuel treatment, there is still no guarantee that your carburetor will not foul up at some point. But these actions do help to prevent nuisance problems with small engines including recreational power sport products and outdoor equipment.
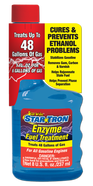
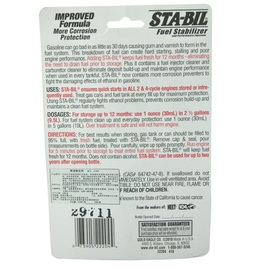
Regarding the brand of fuel stabilizer (There are many on the market): Stabil or Star Tron is suggested. Star Tron works by an enzymatic action whereas Stabil is by different chemicals. The amount you will add to your unit that you purchased depends upon what the solution calls for on ratios (solution to gas-usually depicted by ounces to gallons then for smaller quantities of gas, you must go to ccs--Remember: it takes 30cc to make 1 oz). Remember, both companies make different solutions, but the following solutions are for use in small engines.
Our units Fuel Capacity: StarTron #14308 Sta-bil 22204 Fuel Stabilizer
Model 3050C = 2.4L which equals to .634 gal 3cc to 6.3cc (not oz) 7.6cc
Model 3125R = 2.4L which equals to .634 gal 3cc to 6.3cc (not oz) 7.6cc
Model 3125XR-8 = 2.4L which equals to .634 gal 3cc to 6.3cc (not oz) 7.6cc
Model 3125A = 2.4L which equals to .634 gal 3cc to 6.3cc (not oz) 7.6cc
Model 3125C = 2.4L which equals to .634 gal 3cc to 6.3cc (not oz) 7.6cc
Model 3150DX-2 = 5.0L which equals to 1.32 gal 6.6cc to 13.2cc (not oz) 15.8cc
Model QG-210 = 3.7L which equals to .977 gal 4.9cc to 9.78cc (not oz) 11.72cc
Model QG-214S = 2.5L which equals to .66 gal 3.30cc to 6.60cc (not oz) 7.9cc
Model QG-214F = 2.5L which equals to .66 gal 3.30cc to 6.60cc (not oz) 7.9cc
Model QG-214FC = 2.8L which equals to .75 gal 3.75cc to 7.50cc (not oz) 9.0cc
When using Star Tron Item# 14308 the manufacturer of Star Tron recommends 10ml (10cc) or 1/3 oz per gallon initially and then 5ml (5cc) or 1/6 oz per gallon on refills.
When using Sta-Bil Item# 22204 the manufacturer of Sta-bil recommends 1oz (30cc) for 2.5 gallons of gas.
**You can purchase Sta-bil at Wal-mart or either can be purchased at most Auto Part Supply Stores such as Autozone, O'Reilly's, or others.
Yes, you can use fuel treatment with ethanol-free gas. Be mindful, that a lot of older stations offering ethanol-free gas have older underground storage tanks and some leak water into them. I have had to perform head jobs on some units after water was in gas causing an explosion in the head bending valves, etc. You can easily check for water by pouring some into a clear glass container and watch for separation. Separation will happen within 30 minutes if the container is left undisturbed.
Another consideration with fuel stabilizer, it is still no guarantee that your carburetor will not foul up. There are no guarantees in life. Even if using ethanol-free gas with fuel treatment, there is still no guarantee that your carburetor will not foul up at some point. But these actions do help to prevent nuisance problems with small engines including recreational power sport products and outdoor equipment.
Regarding the brand of fuel stabilizer (There are many on the market): Stabil or Star Tron is suggested. Star Tron works by an enzymatic action whereas Stabil is by different chemicals. The amount you will add to your unit that you purchased depends upon what the solution calls for on ratios (solution to gas-usually depicted by ounces to gallons then for smaller quantities of gas, you must go to ccs--Remember: it takes 30cc to make 1 oz). Remember, both companies make different solutions, but the following solutions are for use in small engines.
Our units Fuel Capacity: StarTron #14308 Sta-bil 22204 Fuel Stabilizer
Model 3050C = 2.4L which equals to .634 gal 3cc to 6.3cc (not oz) 7.6cc
Model 3125R = 2.4L which equals to .634 gal 3cc to 6.3cc (not oz) 7.6cc
Model 3125XR-8 = 2.4L which equals to .634 gal 3cc to 6.3cc (not oz) 7.6cc
Model 3125A = 2.4L which equals to .634 gal 3cc to 6.3cc (not oz) 7.6cc
Model 3125C = 2.4L which equals to .634 gal 3cc to 6.3cc (not oz) 7.6cc
Model 3150DX-2 = 5.0L which equals to 1.32 gal 6.6cc to 13.2cc (not oz) 15.8cc
Model QG-210 = 3.7L which equals to .977 gal 4.9cc to 9.78cc (not oz) 11.72cc
Model QG-214S = 2.5L which equals to .66 gal 3.30cc to 6.60cc (not oz) 7.9cc
Model QG-214F = 2.5L which equals to .66 gal 3.30cc to 6.60cc (not oz) 7.9cc
Model QG-214FC = 2.8L which equals to .75 gal 3.75cc to 7.50cc (not oz) 9.0cc
When using Star Tron Item# 14308 the manufacturer of Star Tron recommends 10ml (10cc) or 1/3 oz per gallon initially and then 5ml (5cc) or 1/6 oz per gallon on refills.
When using Sta-Bil Item# 22204 the manufacturer of Sta-bil recommends 1oz (30cc) for 2.5 gallons of gas.
**You can purchase Sta-bil at Wal-mart or either can be purchased at most Auto Part Supply Stores such as Autozone, O'Reilly's, or others.

____________________________________________________________________________________________________
DO NOT use a synthetic oil as they cause the automatic transmissions to slip in small engines. There is no need to use high-end, expensive oil, rather frequent oil changes are much more important. Manufacturers previously said to use 15-40 as a given, recently they have switched to 10-30. We personally prefer 15-40 due to the heat here in the South but the choice is up to you, and if in doubt, follow the manufacturer's guide.
Yes, Yes, Yes -- 15-40w oil is recommended for diesel and small engines. Any brand will do, just avoid synthetics as they can cause slippage in the automatic atvs engines.
Our suggested oil change schedule (Adhere to the manufacturer's if it surpasses ours):
1st Oil Change: After the first 30 - 60 minutes of riding time (reason: The breakin oil is there to help seal up the engine and to provide for a means to eliminate any residual shavings from the manufacturing process. It is thin and sticky and only provides lubrication for a short term basis.
2nd Oil Change: After the next 8 hours of riding time.
3rd Oil Change: After the next 16 hours of riding time.
4th Oil Change and Thereafter: After the next and subsequent 30 hours of riding time.
When you take out the Incorrect Plug on the Bottom of the Engine
(Instead of the Oil Drain Plug).
(Instead of the Oil Drain Plug).
If you take out the wrong plug, it is a simple fix. It is the same oil that goes to both sides, watch the video above, replace the plunger, spring, and washer (if equipped) and bolt using a 14mm socket. Drain the rest of the oil using the correct drain plug (17mm) and replace oil up to ring on dipstick which is just on top of the diamonds. (We use 15-40w Conventional Oil for our weather conditions down here in the South. Synthetic oil can cause the automatic 110ccs and other engines to slip.)
|
___________________________
Checking your Battery, Charger, and Charging the Battery--Click Video Link to the Right. NEVER JUMPSTART OR QUICK START YOUR ATV. Remember, these are small batteries, they are 12volt but only 4-5 amps. NEVER, NEVER EVER jumpstart your ATV. Remember, we do not accept checks and CC or Debit cards require a 5% surcharge.
|
___________________________
|
A full charge requires at least 6-8 hours of charging. Make sure your extension cord is not near flammables or water.
Sometimes your outlet, extension cord, or charger is bad. The video provides useful demonstrations.
ELECTRICAL, BATTERY, AND CHARGING CONCERNS:
Rule #1: Never jump start the ATV. Only use a trickle charger that is 2amps or below (can be purchased separately) upon buying your unit or later, or a comparable charger. If using other chargers, make sure it is less than 2amps and in that mode before applying to the battery. We can easily determine if a vehicle has been jump started.
Rule #2: We never provide warranty coverage for electrical issues as the majority of people violate Rule #1 or do not adhere to
Rule #3.
Rule #3: Trickle charge the battery routinely to maintain the battery's charge and function and increase the life of the battery. Once a battery goes completely dead and is recharged, it loses some of its longevity. Trying to crank a vehicle with a weak or dead battery, only stresses other electrical components including but not limited to the starter, voltage regulator, and starter relay.
To charge the battery, remove the seat, attach the battery charger with the black clip going to black, and the red going
to red and then plug the charger into the power source. You do not have to remove the battery to charge it. For a full charge, let it charge for 6-8 hours. Routinely charge it and if the vehicle is ran with the lights on all the time, it will be necessary to charge it more often. Even if the vehicle is parked idly in storage, either remove the battery and charge it routinely, or charge it
routinely if in the ATV, at least monthly, if not more often. These little ATVs do not have an alternator so what drains the battery is the use of the lights, next the constant starting it, and third the brake lights while in operation.
|
___________________________
Checking for Spark (Fire)--Click Video Link to the Right. When you cannot start the vehicle, only after all other checks have failed as in the following (the vehicle will make sound as if starter is turning, but will not fire up):
1. Key switch in "On" position. 2. Kill switch on handlebar is in "Run" position. 3. Remote kill switch "Unlock" (Black) button is depressed with key switch in "On" position. 4. Battery charged and checked. 5. Inline fuse check (usually you will not get any sound when fuse is dislocated or blown). |
___________________________
|
CAN BE DANGEROUS. GREAT CAUTION ADVISED. ONLY GIVEN FOR DEMONSTRATIONAL PURPOSES. WE ASSUME NO LIABILITY FOR ANY INJURY OR DAMAGE AS A RESULT OF THIS TEST.
If the battery is fully charged, and all the other items are above have been done, you will need to check for spark which can be dangerous to those who have never performed such a procedure or for those individuals are chronically inhibited by the fear of the unknown or for those who suffer from an anxiety disorder. Either way, we cannot suggest nor advise you to perform such a spark check but the method will be provided to you and we bear no liable for your following the steps even as spelled out which may injure you, others, your property, and the vehicle:
(Never smoke or have an open flame around the area in which you are working in and around) and have your work area
free of hazards of all types and do not allow children to be in your work area for their safety as well as yours. Eye protection and other personal attire is suggested.
IF THERE IS ANY GAS OR FLAMMABLE MATERIAL WHATSOEVER AROUND YOUR AREA OR ON YOUR PERSON, CLOTHES, OR ON THE ENGINE, NEVER, AND I REPEAT, NEVER ATTEMPT THIS!!!!!
STEPS TO CHECK FOR SPARK:
a. Lock the front brake.
b. Remove the spark plug.
c. Place the plug back in the boot as if it were in the engine.
d. Grasp the plastic part of the boot with one hand (Never the metal part or the plug itself).
e. Locate a good metal bolt on the frame or engine.
f. Place the electrodes (the head of the plug) on the bolt you located in "e" above.
g. With the other hand, press the start button. (Or have someone else press the button for you.)
Now, do you see spark going across the plug and bolt? If so, it is probably not an electrical issue. I said "Probably Not" I didn't say "Definitely Not."
At this point, replace the plug back in the engine and attach the spark plug boot correctly and then your concentration should go back to the Carb/Fuel Sections.
Typical Spark Plug Gap on Most of These Chinese ATVs and Dirtbikes: 0.6mm to 0.7mm (.02362in to .02756in).
____________________________________________________________________________________________________
Copyright 2012 All Rights Reserved. R/R Sports International, Inc. dba Blaze Powersports and Outdoors
